Connections
Connections are the publishing sites and accounts your Links campaigns post to (open Connections in the menu). SerpTorch only publishes to properties you own, or accounts you connect with the platform's official API.
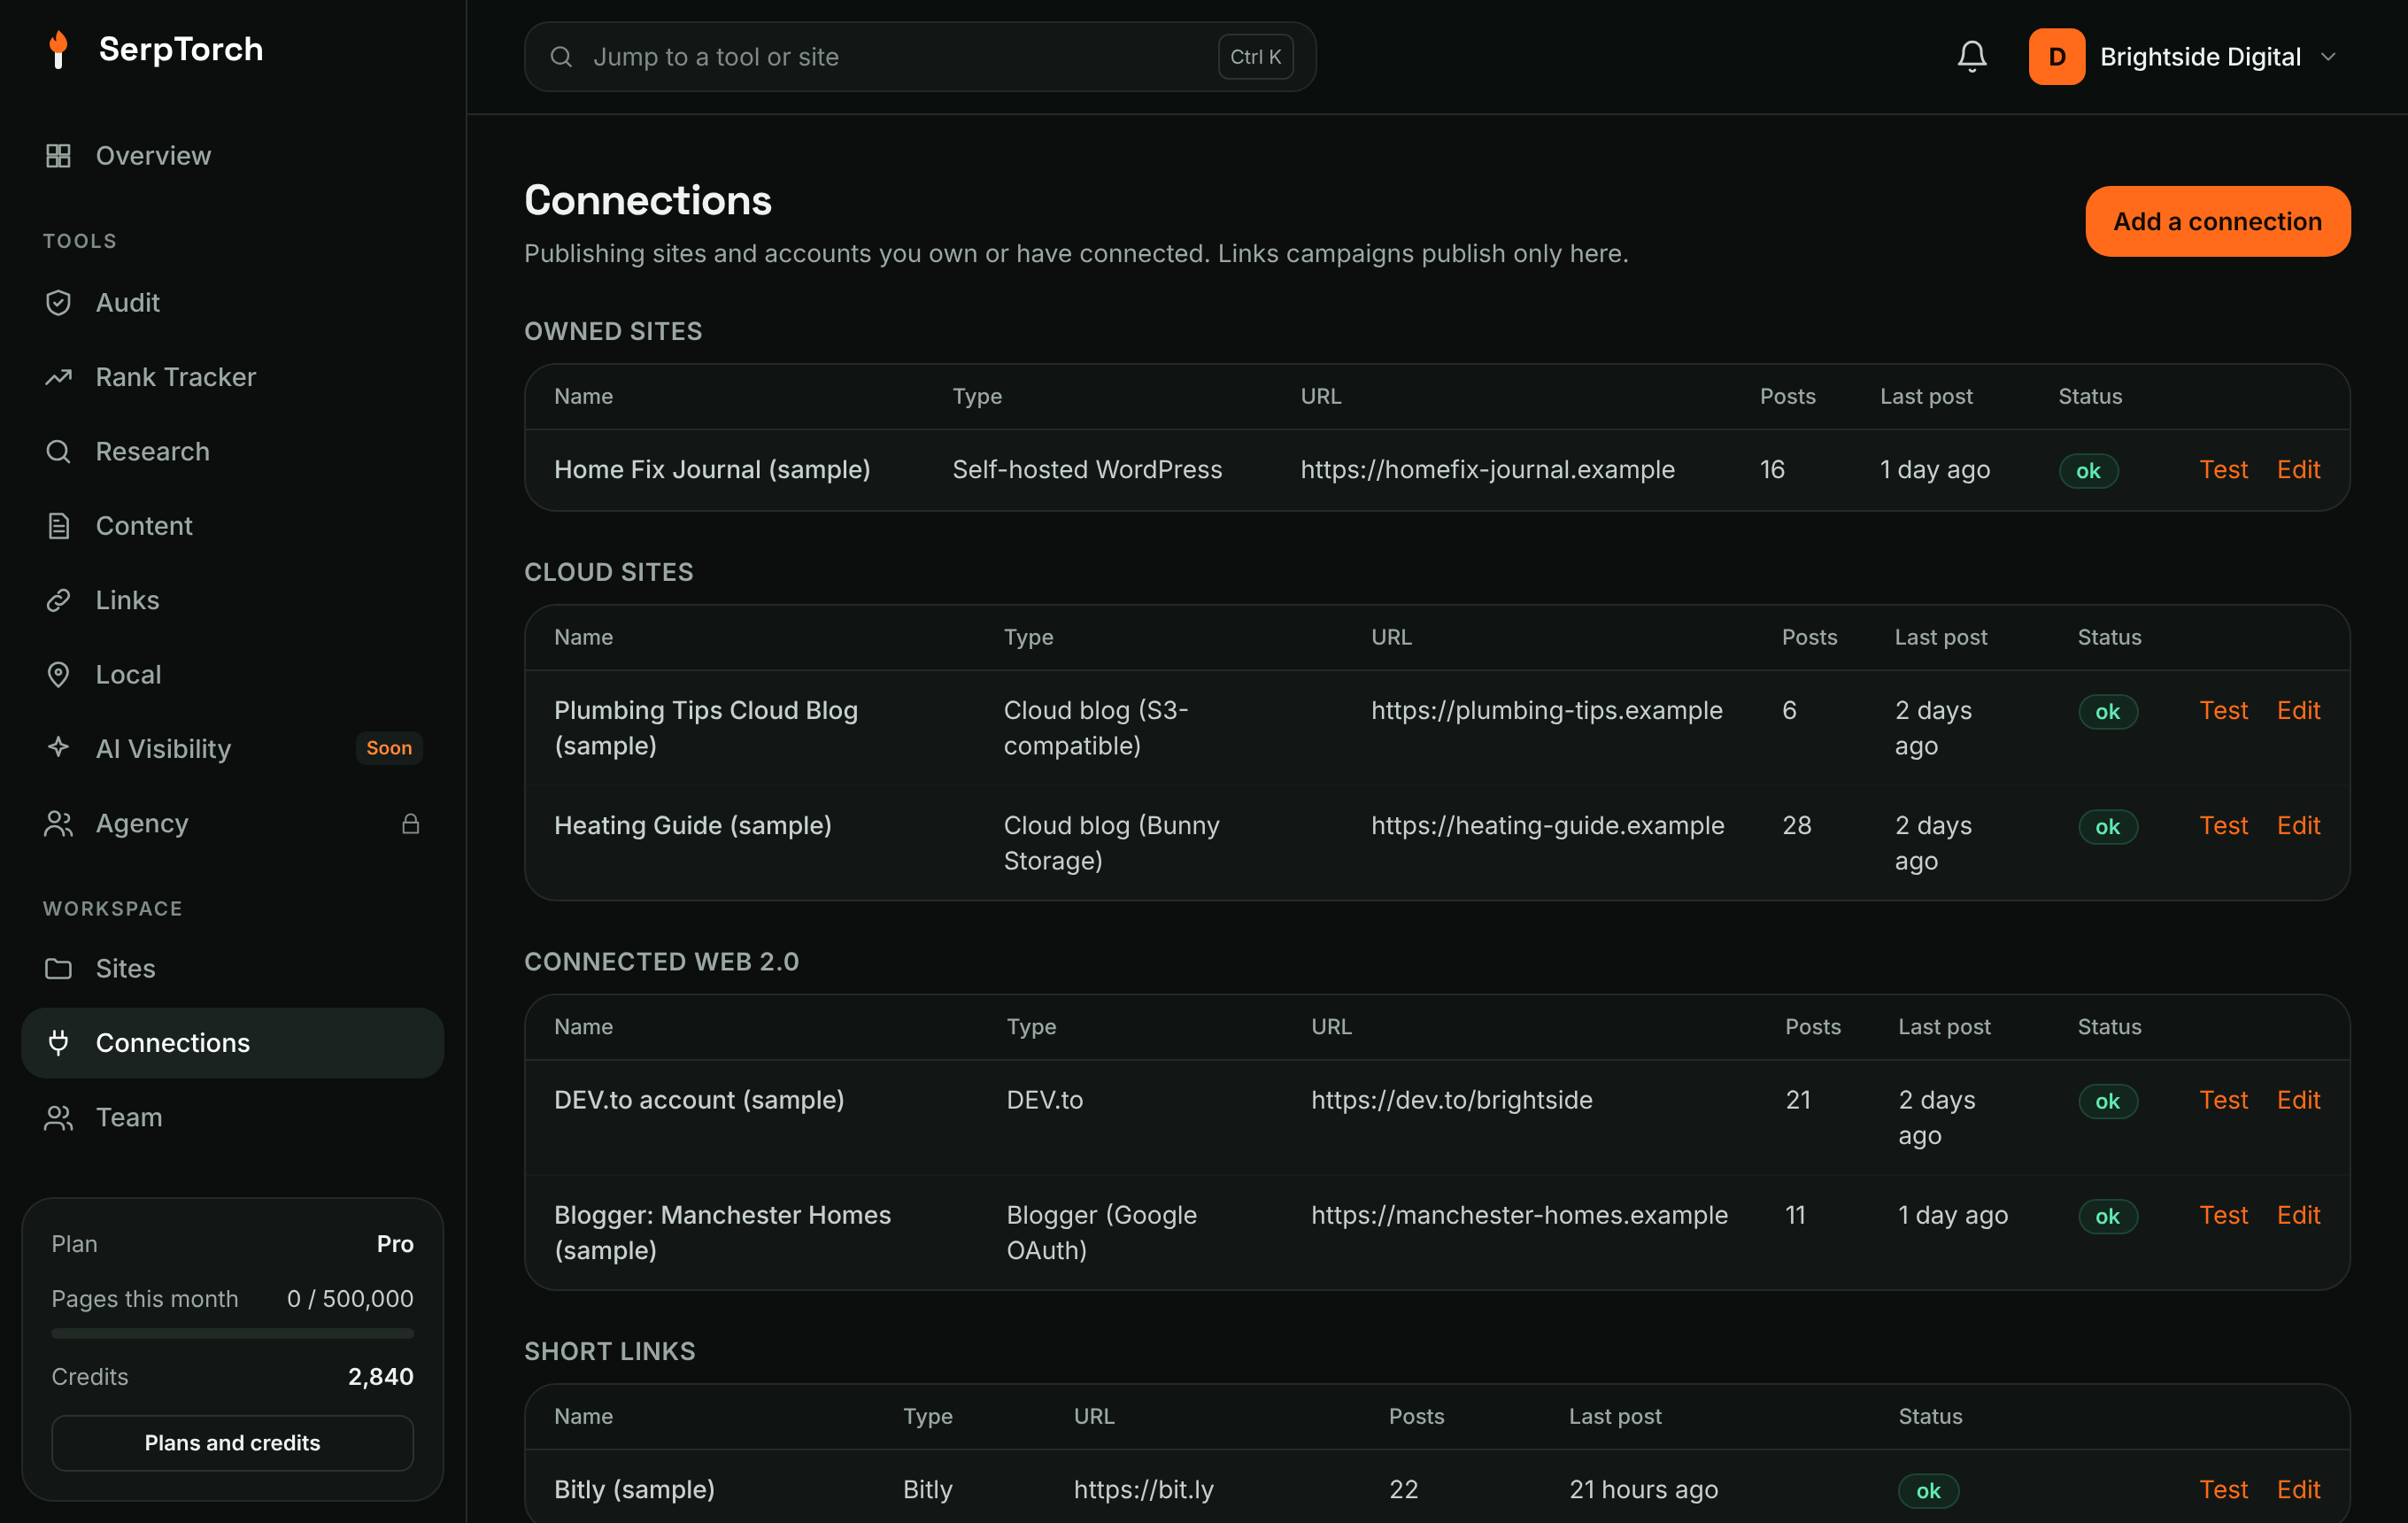
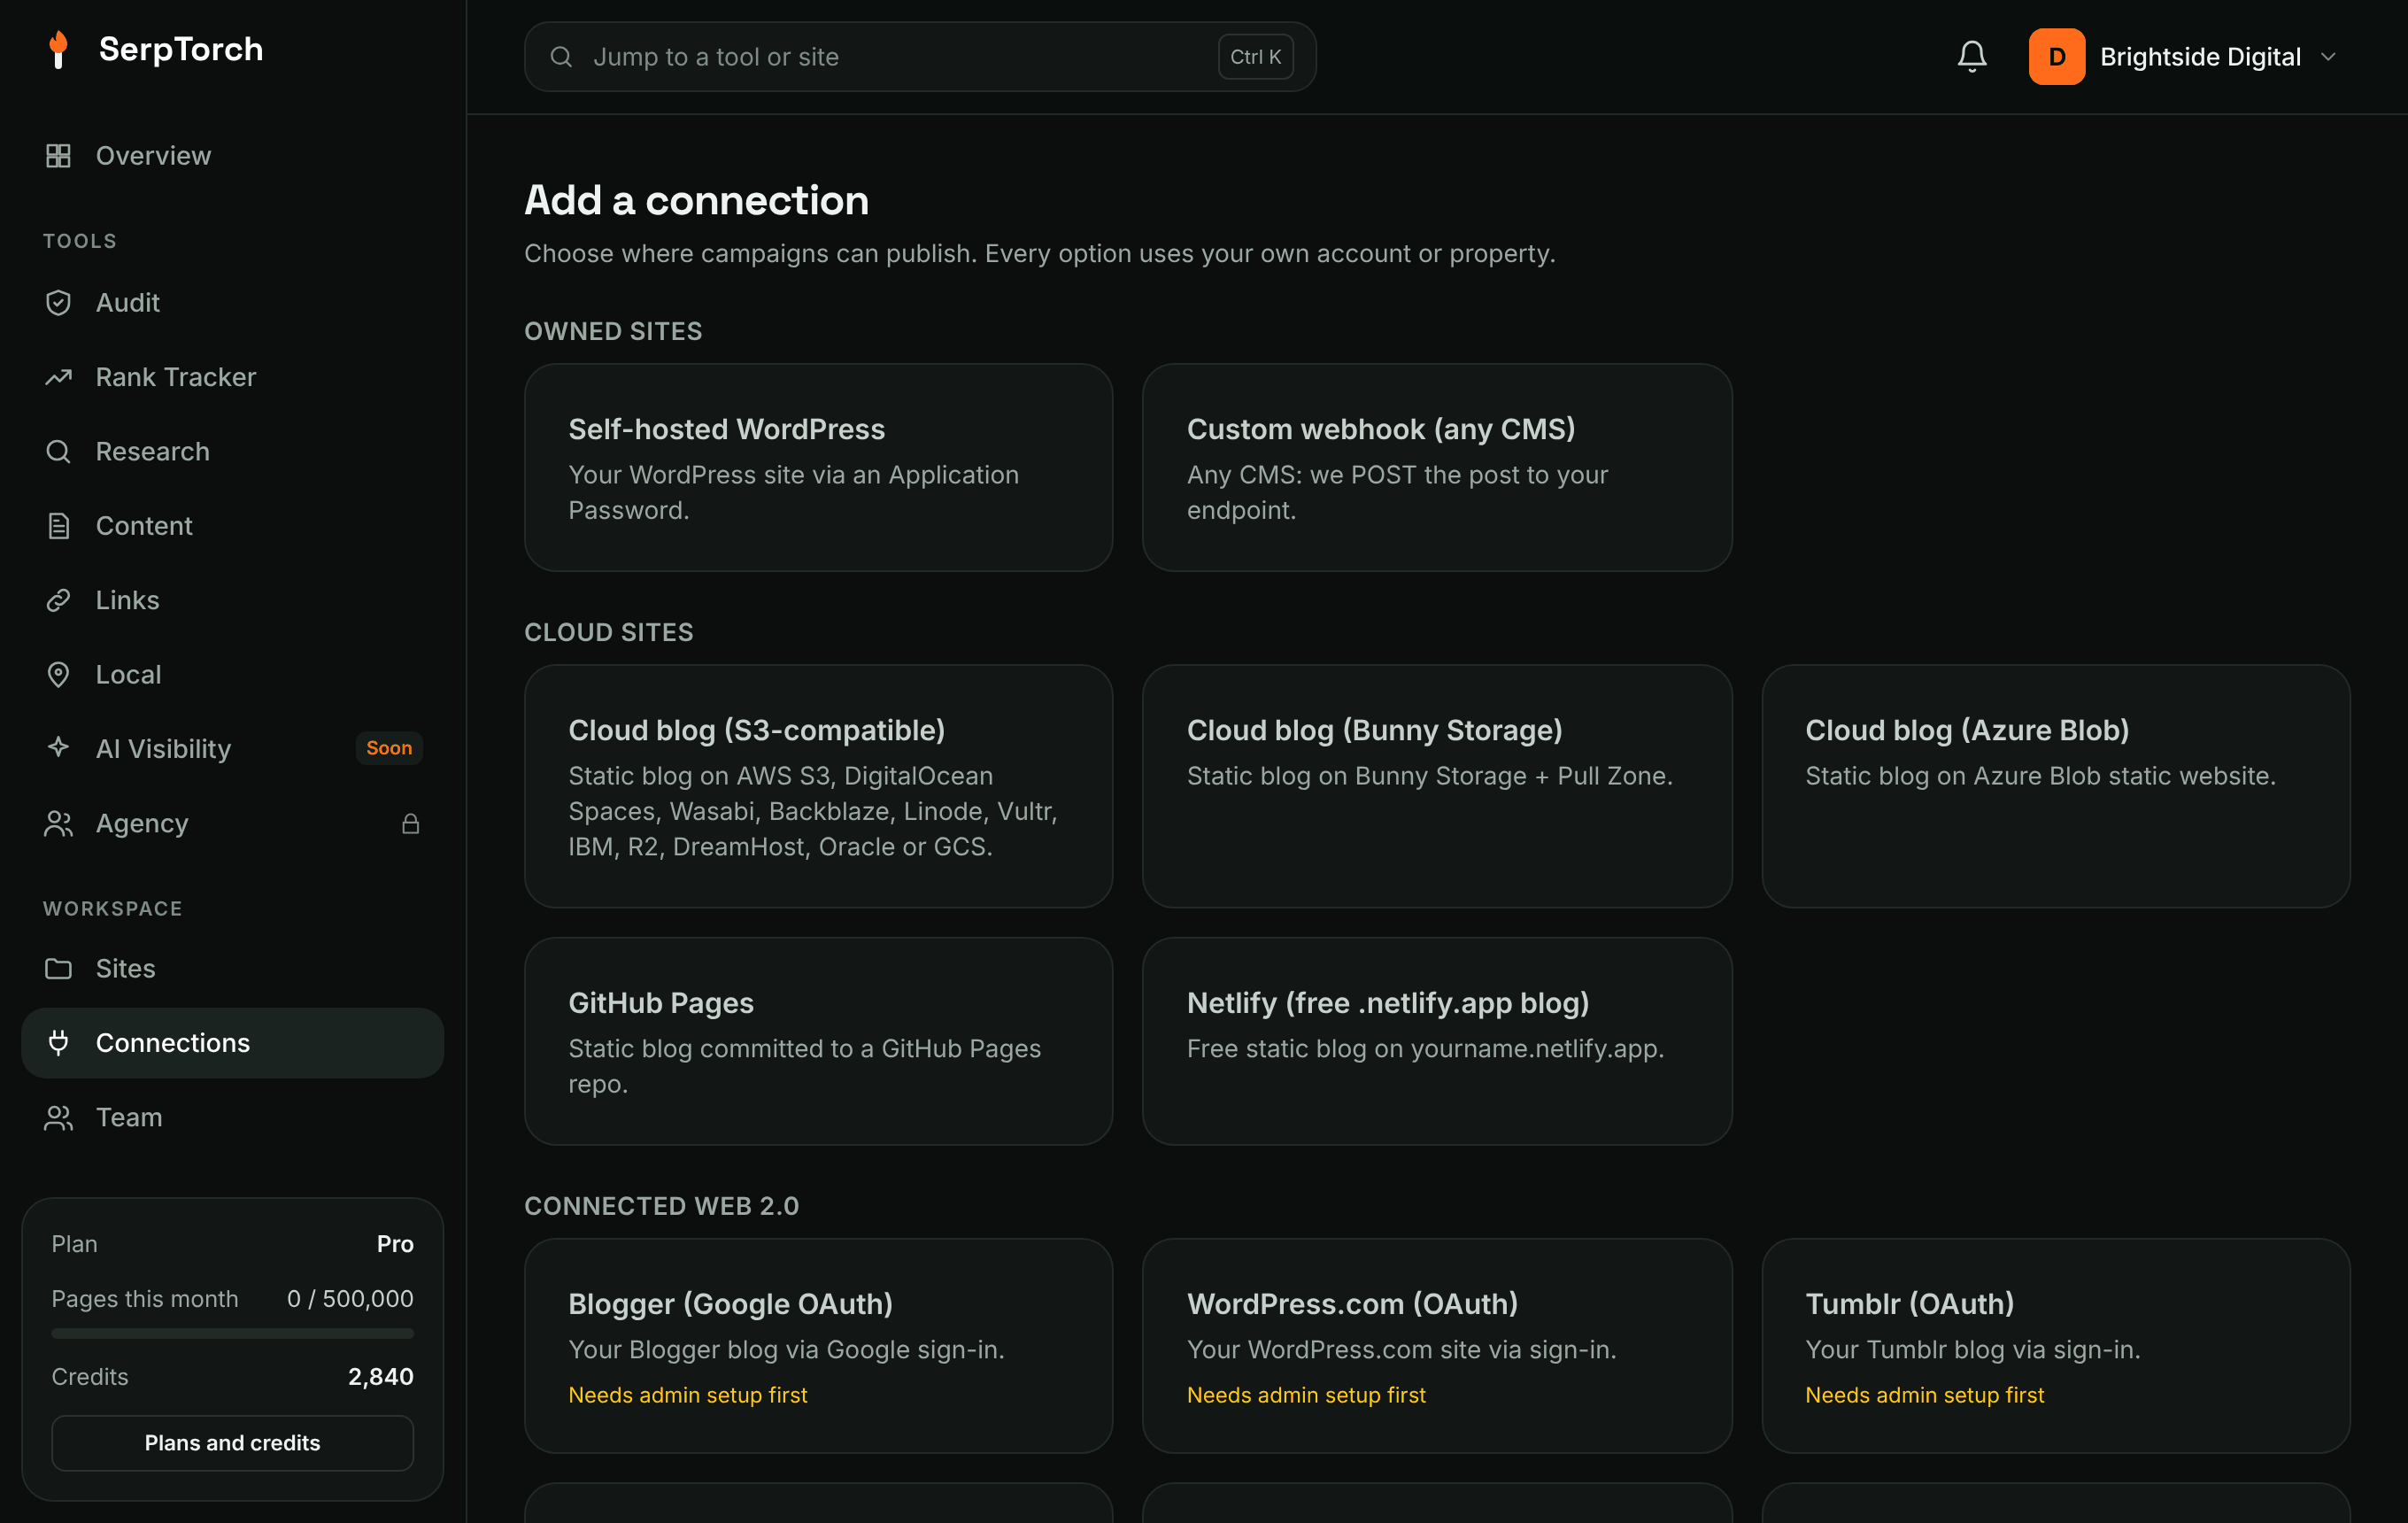
Click Add a connection and choose a type. SerpTorch tests the connection when you save: ok means ready; error shows the reason. Credentials are stored encrypted and secret fields are never shown again (leave them blank to keep the saved value).
WordPress
Self-hosted WordPress 5.6+ with the REST API enabled.
- In WordPress, go to Users → Profile (an Author, Editor or Administrator account).
- Scroll to Application Passwords, enter the name
SerpTorchand click Add New Application Password. - Copy the password shown (spaces are fine).
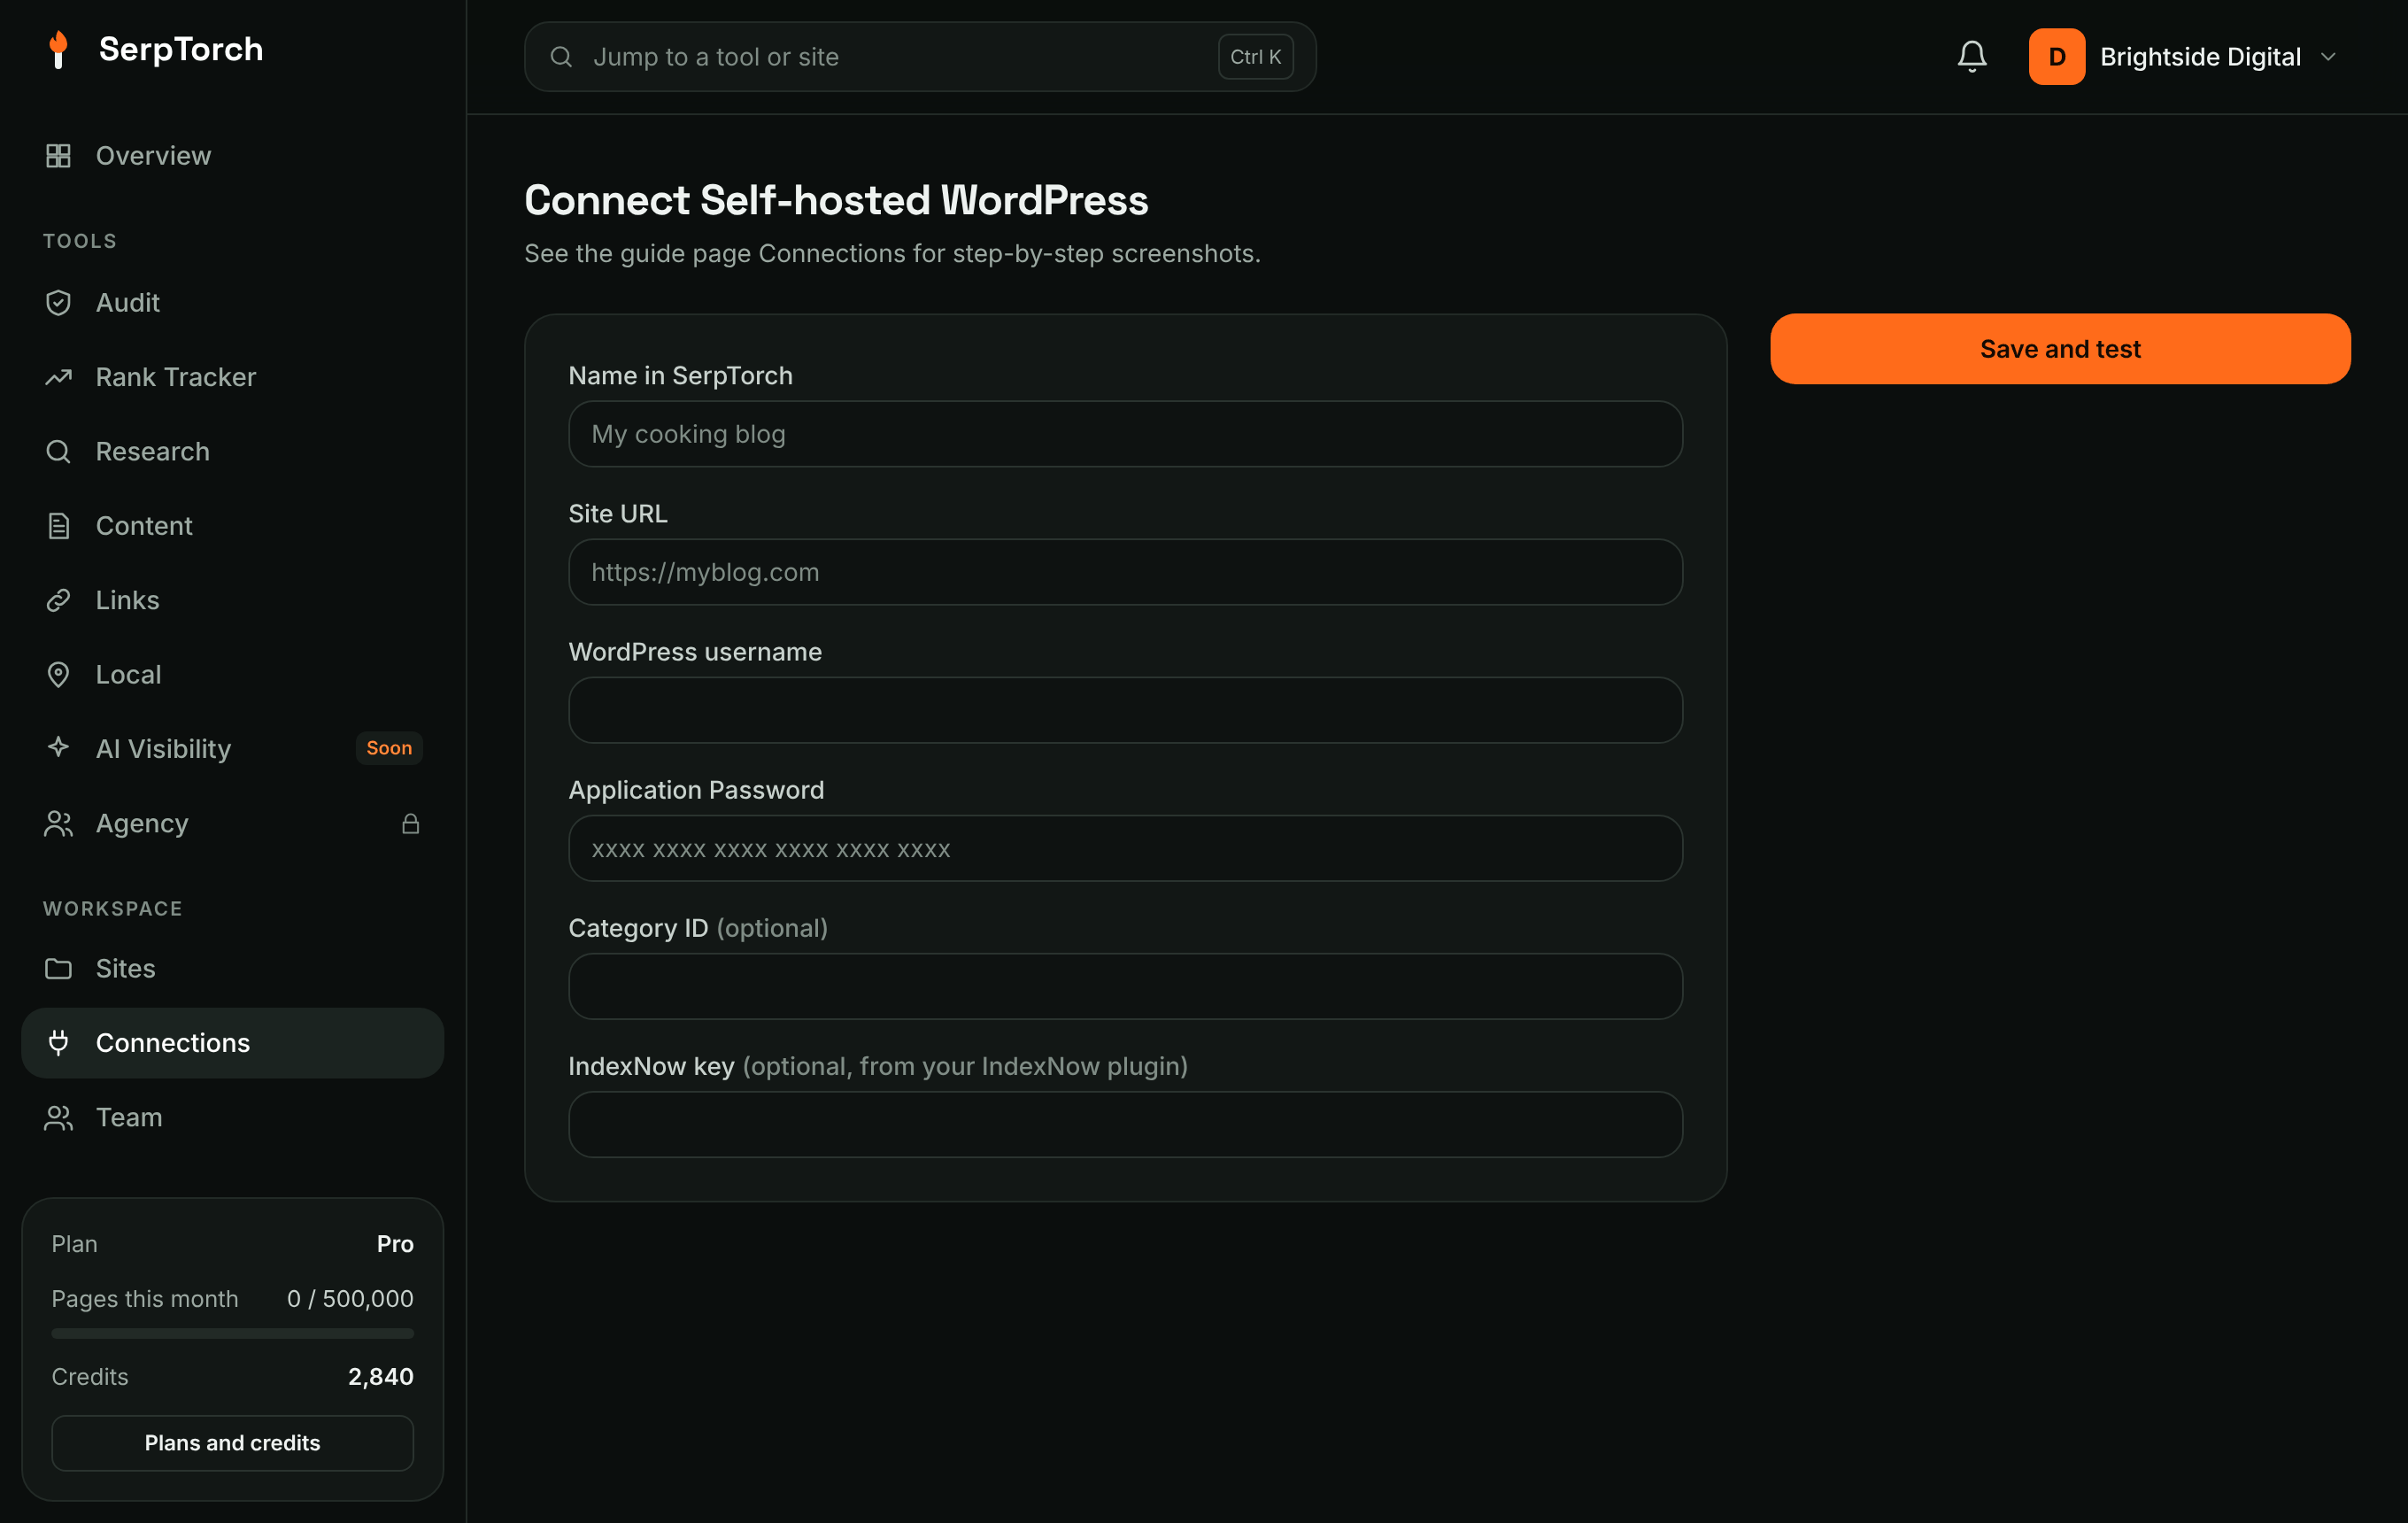
- In SerpTorch enter the site URL, the WordPress username and that Application Password.
Optional: a category ID for new posts, and an IndexNow key if you run an IndexNow plugin.
If the test fails with 401, a security plugin may block the REST API or Application Passwords, or the site is not on HTTPS (WordPress only enables Application Passwords over HTTPS by default).
Cloud blogs
A cloud blog is a static website (HTML files) that SerpTorch builds and uploads into your storage bucket: a home page, one page per post, sitemap.xml, robots.txt and an IndexNow key file. Choose a theme, blog name and author on the form.
| Provider | Choose | Endpoint example |
|---|---|---|
| Amazon S3 | S3-compatible | https://s3.us-east-1.amazonaws.com |
| DigitalOcean Spaces | S3-compatible | https://nyc3.digitaloceanspaces.com |
| Wasabi | S3-compatible | https://s3.us-east-1.wasabisys.com |
| Backblaze B2 | S3-compatible | https://s3.us-west-004.backblazeb2.com |
| Linode / Akamai | S3-compatible | https://us-east-1.linodeobjects.com |
| Vultr | S3-compatible | https://ewr1.vultrobjects.com |
| Cloudflare R2 | S3-compatible | https://ACCOUNT_ID.r2.cloudflarestorage.com (region auto) |
| IBM Cloud Object Storage | S3-compatible | https://s3.us-south.cloud-object-storage.appdomain.cloud |
| DreamHost DreamObjects | S3-compatible | https://s3.us-east-005.dream.io |
| Oracle Cloud | S3-compatible | https://NAMESPACE.compat.objectstorage.REGION.oraclecloud.com |
| Google Cloud Storage | S3-compatible (HMAC keys) | https://storage.googleapis.com |
| Bunny Storage | Bunny Storage | storage zone + region code |
| Azure Blob | Azure Blob | container SAS URL of the $web container |
| GitHub Pages | GitHub Pages | repo + fine-grained token with Contents: write |
For every provider you must:
- Create the bucket and make it publicly readable as a static website (each provider's console has a "static website hosting" or "public access" setting).
- Create an access key with write access to that bucket.
- Enter the Public URL: the address where the bucket's files are visible, for example your bucket website endpoint or a custom domain. Posts are published as
PUBLIC_URL/posts/slug.html.
Exact endpoint formats change over time; copy them from your provider's documentation.
Blogger, WordPress.com and Tumblr
These use sign-in (OAuth). The platform administrator must first switch these on. If a button is missing, ask them. Then:
- Choose the type, give it a name, optionally enter the blog ID / site / blog name.
- Click Continue to sign in, approve access in the pop-up page.
- You return to SerpTorch with the site connected. For Blogger, if you left the blog ID empty, your first blog is used.
Ghost
In Ghost Admin go to Settings → Integrations → Add custom integration, copy the Admin API key (id:secret) and your site URL.
DEV.to and Hashnode
- DEV.to: Settings → Extensions → DEV Community API Keys → generate a key.
- Hashnode: Account settings → Developer → generate a Personal Access Token. The Publication ID is in your blog dashboard URL or in the blog's settings.
Short links (Bitly, Rebrandly)
Short-link nodes create a branded short URL that redirects to the post above it. Bitly: create an access token in Settings → API. Rebrandly: create an API key in the account area. Add your branded domain if you have one.
Free publishing platforms
These free platforms offer official APIs, so SerpTorch can publish to them for you once you connect your account.
| Platform | What you need | Notes |
|---|---|---|
| Telegraph (telegra.ph) | Just an author name | The account is created through Telegraph's API on the first test. No sign-up or captcha. |
| Write.as | Your Write.as username and password | The password is swapped for an access token and then deleted. A free account includes one blog. |
| Notion | An internal integration token and a parent page | In Notion, create the integration (Settings → Connections → Develop or manage integrations), share the parent page with it (••• → Connections), and publish the parent page to the web (Share → Publish). Posts become public sub-pages on your notion.site address. |
| GitHub Gist | A token with the gist scope |
Each post is a public Markdown gist. |
| Google Docs | Sign in with Google | Creates a Google Doc in your own Drive and shares it as "anyone with the link can view". SerpTorch can only see files it created (scope drive.file). Needs the administrator's Google OAuth app with the Drive API enabled. |
| Netlify | A personal access token and a site | A free static blog on yourname.netlify.app. Create an empty site in Netlify first; SerpTorch deploys the whole blog on each post. |
Medium closed its publishing API to new integrations, and sites such as Wix, Weebly, Google Sites, Substack and Quora offer no publishing API. Use the Profiles & citations checklist for those: you create the profile or post yourself, and SerpTorch tracks the link.
Social profiles
Social nodes post a short update with the link to your post or page.
- Mastodon: in your instance go to Preferences → Development → New application, tick
write:statusesandread:accounts, and copy Your access token. Enter the instance URL, for examplehttps://mastodon.social. - Bluesky: Settings → Privacy and security → App passwords → Add App Password. Enter your handle and the app password, never your main password.
Custom webhook (any CMS)
For a CMS without a built-in connector. SerpTorch POSTs JSON to your endpoint:
{ "event": "post.publish", "title": "…", "html": "…", "target_url": "…", "anchor": "…", "tags": [] }
The X-SerpTorch-Signature header is HMAC-SHA256(raw body, your secret). Your endpoint must create the post and reply with {"url": "https://published-post-url"}. A test call sends {"event": "ping"} and only needs a 2xx response.